How to Remove a Tick Bite Safely (Step-by-Step Guide)
Tick bites are not harmless. If you remove a tick the wrong way, you increase the risk of infection and disease. Do it properly. No myths. No shortcuts.
Step 1: Use the Right Tool
Use fine-tipped tweezers. Not fingers. Not oil. Not fire.
Step 2: Grab the Tick Correctly
Grip the tick as close to the skin as possible, right at the head.
Do not squeeze the body. That can push bacteria into your skin.
Step 3: Pull Straight Up
Pull slowly and steadily, straight out.
No twisting. No jerking.
If part of the tick breaks off, try to remove it with clean tweezers. If you can’t, leave it and let the skin heal.
Step 4: Clean Everything
After removal:
Wash the bite area with soap and water
Disinfect with alcohol or antiseptic
Clean the tweezers too
Step 5: Watch the Bite
For the next 30 days, monitor the area.
See a doctor immediately if you notice:
A spreading red rash (especially a bull’s-eye shape)
Fever or chills
Headache or muscle pain
Fatigue or joint pain
These can be signs of tick-borne diseases.
What NOT to Do
❌ Don’t burn the tick
❌ Don’t smother it with oil, Vaseline, or alcohol
❌ Don’t crush it with your fingers
Those methods make things worse.
Prevention Is Smarter
Wear long sleeves and pants in grassy or wooded areas
Use insect repellent
Check your body after being outdoors
Shower soon after exposure
Ticks are small. The damage they cause isn’t.
Related Posts

My 12-Year-Old Daughter Cut Off Her Hair for a Girl with Cancer – Then the Principal Called and Said, ‘You Need to Come Now and See What Happened with Your Own Eyes’
I rushed to the school after the principal called to say unfamiliar men were asking for my daughter, convinced grief was about to steal one more thing…

PART 2 My 12-Year-Old Daughter Cut Off Her Hair for a Girl with Cancer – Then the Principal Called and Said, ‘You Need to Come Now and See What Happened with Your Own Eyes’
And fear, I had discovered, did not wait to be invited. The previous night, I had found my daughter standing barefoot in the middle of it. “Letty?”…

PART 3 My 12-Year-Old Daughter Cut Off Her Hair for a Girl with Cancer – Then the Principal Called and Said, ‘You Need to Come Now and See What Happened with Your Own Eyes’
Two hours later, Principal Brennan called. By the time I arrived at the school, my palms were slick against the steering wheel. Mr. Brennan was already standing…
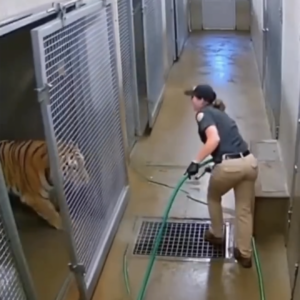
Tense Moment as Tiger Approaches Keeper During Cleaning Routine
A tense moment was captured on security cameras at a zoo when a large tiger approached the gate of its enclosure while a keeper was cleaning the…
My Coworkers Teased Me for Eating Lunch with the Lonely Janitor Every Day for 11 Years – At His Funeral, His Lawyer Pulled Me Aside and Said, ‘Mr. Wilson Left This for You
I was too anxious to touch my lunch on my first day at work, and Charles was the only person who seemed to notice. For 11 years,…

PART 2 My Coworkers Teased Me for Eating Lunch with the Lonely Janitor Every Day for 11 Years – At His Funeral, His Lawyer Pulled Me Aside and Said, ‘Mr. Wilson Left This for You
I figured it was a grocery list, or maintenance reminders, or something just as ordinary. I never asked. That is the part I keep returning to now….